

Phone Photography · Group Photos
Capture Perfect Photos With the Whole Group
Six people, ten variables, one chance. Group photos are the hardest shot in casual photography — here's how to get it right every time, including the problem nobody talks about.
Group photos are deceptively difficult. On paper they sound simple — point the camera, push the button — but in practice, every group shot is a juggling act of timing, composition, lighting, expressions, and human cooperation. One person blinks. Another looks away. The light shifts. The photographer's arm shakes. What should have been the photo of the trip ends up unusable.
Worse, the person who probably knows the most about photography in the group — the one with the steady hand, the eye for framing, the patience to wait for everyone to settle — is usually the one stuck behind the camera. Which means they're never actually in the picture.
This guide breaks down exactly what goes wrong with group photos and how to fix each piece. Most of it costs nothing. The last fix — the photographer's problem — has been solved exactly once, and we'll get there at the end.
The Five Universal Group Photo Failures
Before solutions, the diagnosis. Almost every bad group photo fails for one of these five reasons — and once you know what to look for, you can fix each one in advance.
The blink. In any group of six, the odds of at least one person blinking on any given frame are roughly one in three. That's why one shot is never enough.
The forced smile. Saying "cheese" produces what every viewer recognizes as a posed grin. Real expressions need a different trigger.
Bad framing. Someone gets cut off at the edge, the headroom is wrong, or there's awkward space above the group. These mistakes happen in the half-second before the shutter and stay forever.
Wrong light. Direct sun produces squints and shadows under eyes. Indoor mixed light flattens faces and shifts skin tones toward yellow or green.
The missing photographer. The most common failure, and the one most people accept as inevitable. It's not.
Five Composition Rules That Actually Work
Composition is the difference between a snapshot and a photograph. Apply these five rules in order — they take seconds to set up and dramatically improve every group shot you take.
01
Stagger the Heights
A line of people standing shoulder-to-shoulder reads as a yearbook photo. Stagger heights instead — some seated, some kneeling, some standing, some leaning against something. Even a six-inch height variation between any two adjacent people transforms the frame from a row into a composition.
If everyone is standing, ask the front row to take a half-step forward and slightly turn their bodies inward — instant depth.
02
Close the Gaps
The single most common composition mistake is leaving too much space between people. A photo where everyone has elbow room reads as a stiff, formal occasion — even if the group is close friends. Tighten the spacing until shoulders are nearly touching, and the photo immediately looks warmer and more natural.
A simple cue: tell everyone to "lean in" and watch the frame fill itself.
03
Mind the Edges
Before pressing the shutter, scan the four edges of the frame. Is anyone clipped? Is there too much empty space above the heads? Is the floor or ground eating half the photo? A good group composition leaves a bit of breathing room around the entire group — not too tight, not too loose. The eye should rest on the people, not the corners.
Aim for roughly the height of a head's worth of space above the tallest person and below the lowest visible body.
04
Choose the Background First
Most people pose the group, then notice the background. Reverse it. Find a clean background first — a wall, a vista, a doorway, a tree line — then position the group in front of it. The best background isn't necessarily the most dramatic one; it's the one that doesn't compete with the people. Avoid backgrounds with strong vertical lines (signposts, lampposts) directly behind anyone's head.
Quick test: if the background is busier or more colorful than the group, change the background.
05
Shoot at Eye Level
Phone cameras held at chest height look down at the group. Phones held over the head look up at it. Both produce subtle but unmistakable face distortion — chins look bigger, foreheads look stretched, eye lines feel off. Get the lens to the average eye height of the group and the proportions snap into place.
If the group is seated, kneel. If they're standing, stand on something or back up. Eye level is non-negotiable for flattering portraits.
The Camera Settings That Matter
Modern phones have more shooting modes than they have buttons. For group photos, the right answer isn't always the fanciest mode — sometimes the standard photo setting beats every "smart" option your camera offers.
Timing — How Pros Get the One Good Frame
Even with perfect composition and the right settings, group photos still come down to timing. Pros don't take one shot of a group — they take many, knowing that the difference between a good photo and a great one is often a half-second of expression.
The single most useful trick on most modern phones is the 3-second self-timer + burst combo. On iPhone, set the timer to 3 seconds in the Camera app — when the timer fires, the phone automatically shoots a burst of 10 frames in rapid succession. On Samsung, enable "Take pictures while holding shutter" or use the dedicated burst gesture. Either way, you're no longer hoping that one frame catches everyone with open eyes; you're guaranteed it.
For the moment of capture itself, abandon "say cheese." Try one of these instead: count down out loud ("three, two, one — go!"), prompt an action (clink glasses, jump, throw confetti), or — best of all — talk to the group while quietly firing burst frames. The candid moments between the posed shots are almost always better than the posed shots themselves.
"The best group photos aren't the ones where everyone looks at the camera and smiles. They're the ones where the camera caught a moment the group was already living."
Getting Real Expressions, Not Posed Ones
The hardest part of any group photo is the human element. Composition can be diagrammed, settings can be memorized — but expressions are wild. The best photographers have a few simple tricks for pulling natural smiles out of a stiff group.
Tell the group to look at each other instead of the camera. The instant of recognition produces a real smile that the lens still catches. Or shoot two frames: one posed, then keep the camera up and shoot the second a beat later, when everyone exhales and laughs. The second frame is almost always better than the first.
If the group is too self-conscious to relax, give them something to do — a toast, a pose, a jump, a hug. Action breaks tension and the resulting photo feels alive instead of staged. The hardest group photo to nail is the one where everyone is just standing there.
The Photographer's Dilemma
Every guide to group photography conveniently skips the most universal problem: the person taking the photo isn't in the photo. The traditional answers are all bad. Asking a stranger means handing your phone to someone with no idea how you want it framed, no patience to wait for the moment, and a fifty-fifty chance the photo comes back blurry. Selfie sticks fix the framing problem but introduce new ones — the stick is visible in the shot, the reach is limited to about three feet, and the whole rig is unstable in any breeze. Conventional tripods solve all of it but only if you happened to bring one. Most people don't.
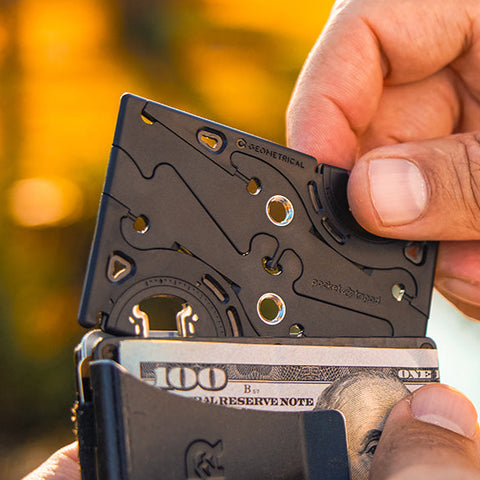
The Pocket Tripod is the answer to a problem nobody bothered to solve well. It's the size of a credit card, lives in your wallet, unfolds in seconds, fits any phone with any case, and adjusts to any angle from flat to vertical. Set it on a railing, a table, a rock, the ground. Use the 3-second self-timer + burst combo from earlier. Jump in. The whole group is in the photo, the photographer included, framed properly, with ten frames to choose from. It's the single piece of gear that turns "we never get a good group photo" into "we always do."
The Tool Behind the Shots
Stop Missing Yourself in Every Group Photo
The Pocket Tripod PRO v2 is credit-card thin, fits any phone, any case, and adjusts to any angle. Set it down, set the timer, jump in. Lifetime warranty. Rated 4.8 stars by 9,800+ Kickstarter backers.
Shop Pocket Tripod →Use code PLAYBOOK15 for 15% off your first order
Quick Reference Cheatsheet
Everything in one place. Save this for the next time the group photo moment arrives.
The Real Takeaway
Group photos fail in predictable ways, which means they can be fixed in predictable ways. Composition is the foundation — heights, spacing, edges, background, eye level. Settings come next — standard mode, HDR on, ultra-wide and Portrait mode off. Timing and expressions are the human layer — burst the shot, prompt the moment, take more frames than you think you need.
And the photographer's problem — the universal frustration of never being in the trip's best photo — comes down to gear. A wallet-sized tripod and a three-second timer is all it takes to flip from "ask a stranger" to "everyone in the frame, every time." Once you've done it that way once, you won't go back.
Looking for more? Read our guide on the best camera settings for sunny outdoor photos or learn how to film yourself when solo traveling.

