

How to Film Yourself When Solo Traveling
Here's the solo travel photo situation you know too well: you're standing in front of something extraordinary — a cathedral at blue hour, a coastline at golden hour, a market you spent an hour finding — and your entire visual record of that moment is a slightly awkward selfie taken at arm's length with your face inexplicably enormous in the frame. You were there. The photo doesn't know that. This guide fixes that, covering everything from framing yourself like a storyteller to the practical tools that mean you never have to ask a stranger to take your photo again.
What You'll Learn
Framing Without Help The Environmental Portrait Video Walk-and-Talk Tools That Don't Scream Tourist The Editing Workflow
First: Stop Thinking About Yourself as the Subject
The best solo travel photos aren't portraits in front of landmarks. They're environmental images where a person — you — provides scale, context, and a human point of entry into the scene. The cathedral isn't the background for your selfie. You're a small figure that gives the cathedral meaning and dimension.
This reframe changes everything about how you approach the shot. Instead of getting close to the camera to fill the frame with your face, you want distance — 5, 10, sometimes 20 meters between you and the phone. You want to be a silhouette in a doorway, a small figure on a long road, a lone person at the edge of an overlook. Your presence tells the story. The environment tells it with you.
This also means the shot requires a stable camera and enough distance to frame it properly. That's the part we'll cover in detail.
4 Framing Approaches That Actually Work Solo
01 — The Environmental Silhouette
Set your phone 5–15 meters away on a flat surface or ledge, frame with a strong backlight source (window, sunset, streetlight), and position yourself in the middle distance. The phone is focused on the environment; you appear as a defined but secondary figure. Works beautifully for doorways, tunnels, wide streets, and waterfront scenes. Use your timer or a Bluetooth remote to trigger without running.
Setup time: ~30 seconds with a stable support
02 — The Walking Away Shot
Place your phone on a surface, frame a path, alley, or beach ahead of you, and start walking. Trigger a burst or video. The most cinematic version of this has a slightly raised camera angle looking down a receding path. Genuinely one of the most compelling compositional approaches for travel — the viewer is invited to follow you into the scene. No one knows you're alone. Everyone assumes you have an excellent photographer companion.
Best for: alleys, beaches, mountain paths, long corridors
03 — The Frame-Within-a-Frame
Find an architectural frame — an archway, a window, a doorway — and place yourself inside it. Set the camera back far enough that the frame fills the shot. This technique makes selfie avoidance invisible: no one can tell whether you're using a remote or a photographer, because the composition clearly required intentional setup. Works in markets, ruins, restaurants, and historic buildings.
Bonus: works in any light condition since the architecture absorbs exposure variation
04 — The Candid (You're Not Looking)
Set the camera, point it at a scene you're interacting with — a street food stall, a bookshop window, a map — and let it capture you engaged rather than posed. These are often the best shots from a trip because they look genuinely documentary. Set to burst or video, trigger from a distance, and keep moving. Looking at your phone while the camera is taking your picture is the one thing that destroys this illusion.
Rule: Never look at the camera. Ever.
The Tools That Make This Work
Every framing approach above depends on one thing: your phone being stable and unattended while you're in front of it. Here's what makes that possible without looking like you're setting up a photo studio in public.
▶
The Best Kept Solo Travel Secret
Shoot 4K video instead of photos. Set the phone on your Pocket Tripod, press record, walk into the scene, do whatever you're doing for 30–60 seconds, walk back. In post, scrub through the video, find the frame you like best, and export it as a still. Modern 4K video gives you a 8MP+ still — plenty for social media and printing up to 12×16". No remote needed, no awkward sprinting, no missed timing.
Filming Yourself for Video: The Walk-and-Talk Setup
Solo travel video — the kind where you're walking, talking to camera, narrating what you're experiencing — is what most travel content creators are actually trying to create. Done well it's compelling and intimate. Done badly it looks like you're lost and having a one-sided argument with your phone.
The technical challenge is that you're the camera operator and the subject simultaneously. Here's how to make that work:
Walk-and-Talk Setup Protocol
1
Find your starting position
Pick a spot 3–5 meters from where you'll begin, on a surface where the Pocket Tripod can sit. Aim the camera at your intended walk-direction. The phone should capture roughly 2/3 you, 1/3 environment ahead of you.
2
Set auto-tracking if available
Both iPhone and Samsung have face tracking / subject tracking. Enable it before you walk away. This allows moderate side-to-side movement while keeping you in frame.
3
Walk slightly past the frame, not directly into it
Walking directly toward the camera looks aggressive on screen. Walk at a slight angle — 10–20° off center — so you pass the camera rather than approaching it head-on. Much more natural in the edit.
4
Start talking before you enter frame
Press record, wait 3 seconds, then start talking and walking into frame. This gives the audio a running start and makes the entrance look intentional in the edit rather than scrambled.
5
Shoot more clips than you think you need
Most solo content creators shoot 3–5 versions of each walk-and-talk clip. The first one is always stiff. The third one is usually the one. If it takes 2 minutes and 5 attempts to nail a 30-second clip, that's still fast.
"Nobody knows you're alone unless you act like it. Confident framing and a stable camera produce images that look professionally shot — because they were, just not by a second person."
5 Mistakes That Make Solo Travel Photos Look Awkward
The Gear You Need: Simpler Than You Think
Everything in this guide requires just two things from a hardware perspective: a phone and a stable place to put it while you're in front of it. The phone you already have. The stable support is where most people overcomplicate things.
Full-size tripods work in theory but nobody brings them everywhere. Extended selfie sticks help with distance but cap out at a meter or two and look like exactly what they are. The gap in the market — and the reason the Pocket Tripod PRO v2 has a devoted following among solo travelers — is something that's always available, deploys instantly, and makes no announcement about what you're doing. It sits in your wallet. You put it down on any flat surface — a ledge, a step, a wall, the ground — and your phone has a stable, angle-adjustable base in about 10 seconds.
Pair it with a cheap Bluetooth shutter remote or your Apple Watch camera remote, and you have a complete solo photography rig in under 50 grams that fits in your pocket. The shots in this guide aren't possible without stability. The Pocket Tripod is the simplest, most portable way to get there.
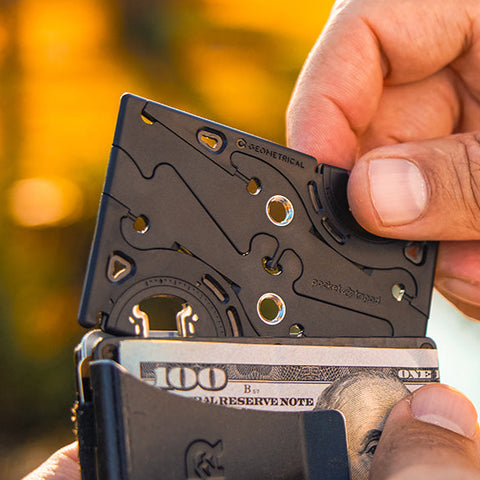
Pocket Tripod PRO v2
Never Ask a Stranger to Take Your Photo Again
Credit-card sized. Fits in your wallet. Works with any phone and case. Deploys on any flat surface in seconds. The solo traveler's most underrated tool.
Shop the Pocket Tripod
