Phone Photography · Self-Portrait Techniques
9 Solo Self-Portrait Techniques
How to take genuinely good photos of yourself, alone, without a selfie stick or an awkward arm in the frame. Nine techniques that work, ranked from beginner to advanced.
Most people have given up on taking real photos of themselves while traveling alone. Asking a stranger feels weird. Selfie sticks look like selfie sticks. The arm-extended phone selfie has the same problem it had a decade ago. It always looks like an arm-extended phone selfie. So we settle for a few unflattering shots and call it a trip.
There's a better way. The same techniques that professional photographers use to make portraits of other people work just as well when the subject is you. The only thing that changes is who pushes the shutter, and modern phones, with timers and burst modes and remote triggers, have solved that part. What's left is composition, light, and a tiny piece of gear that holds the phone steady where you set it.
Below are nine self-portrait techniques that produce genuinely good photos of you, taken by you, with nothing more than a phone and a wallet-sized tripod. They're ordered roughly from easiest to most advanced. Master three of them and you'll never come home from a solo trip with bad photos of yourself again.
The Difference Between a Selfie and a Self-Portrait
A selfie is a photo you take by holding the phone in front of your face. A self-portrait is a photo you compose. The two look completely different. Once you understand why, you stop taking the first kind.
Selfies use the front camera. Most phones have a much weaker front camera than a rear one (fewer megapixels, smaller sensor, no telephoto, no proper portrait mode). Real self-portraits use the back camera, which means the phone has to be set down somewhere or held by something other than your hand.
Selfies are taken at arm's length. An extended arm puts the lens 18–24 inches from your face, close enough to distort proportions and reduce everything in the background to a slice of context. A real self-portrait uses a longer working distance, typically 4–10 feet, which makes faces look natural and lets the environment actually appear in the frame.
Selfies are about the face. Self-portraits are about the scene. A great self-portrait gives equal weight to you and to where you are. The mountain, the cafe, the architecture, the light. These are the reasons you want a photo of yourself in the first place. Crop them out and the photo loses what made it worth taking.
The Nine Techniques
Each technique below produces a recognizably different look. Pick two or three that fit how you travel and where you go. Once you've shot any of them once, the next one comes faster.

01
The Golden Hour Side Profile
Difficulty: Beginner · The most flattering light there is
Position yourself so the setting or rising sun is at roughly 45 degrees behind you. Set the phone on its tripod 6–8 feet away at eye level. Turn your body about three-quarters away from the camera and look slightly toward the light. The result: warm rim light wrapping the back of your hair and shoulder, a soft glow on one side of your face, the rest dropping into gentle shadow.
Settings: Portrait mode, exposure -0.3 EV, HDR off, 3-second timer. Take five frames; pick the best one.

02
The Silhouette Against the Sky
Difficulty: Beginner · No face = no awkwardness
Stand against an open sky at sunset or sunrise: a ridge, a beach, an overlook. Set the phone low to the ground, angled up so the horizon is in the bottom third of the frame. Tap on the bright sky to expose for it; you'll go dark, the sky will keep its color. Pose simply: stand still, arms at your sides, or arms raised in a recognizable shape. Silhouettes work because the eye reads pose and gesture clearly even without facial detail.
Settings: Standard photo, tap-to-meter on sky, exposure -0.7 EV, HDR off. The darker the silhouette, the more graphic the shot.

03
The Window Light Indoor
Difficulty: Beginner · Free studio lighting
Find a large window with indirect light (overcast skies and shaded windows are best). Position yourself 3–4 feet from the window with the light hitting one side of your face at 90 degrees. Set the phone on a desk, shelf, or counter at chest height, opposite a darker wall. The contrast between the window-lit side and the shadow side is what creates dimension. This is the same setup professional portrait photographers use; you're just borrowing it.
Settings: Portrait mode if available, HDR on, exposure auto. A piece of white paper opposite the window softens the shadows if you want a less moody look.

04
The Walking-Into-Frame Shot
Difficulty: Beginner · The candid that isn't candid
Frame the shot first as a landscape or street scene with a clear path or open space leading into the middle of the frame. Set a 10-second timer (which on most phones triggers a burst of 10 frames). Walk into the composition. Slowly, naturally, without looking at the camera. The result is a frame that looks like someone else captured a candid moment of you, instead of a posed shot. The walk creates motion and intent that a stationary pose can't.
Settings: Standard photo, 10-second timer, burst on. Pick the frame where you're at the spot you pre-marked mentally.

05
The Low-Angle Hero Shot
Difficulty: Intermediate · Make any moment look epic
Place the phone on the ground or a low surface (a rock, a curb, a stair) angled steeply upward. Stand 6–10 feet back so most of the frame is sky behind you. The low angle makes you look taller, more powerful, and lets the sky do compositional work. Switch to the 0.5x ultra-wide lens for maximum drama; just stay near the center of the frame to avoid edge distortion. This is the shot that turns a normal moment on a hike or rooftop into something cinematic.
Settings: 0.5x lens, HDR on (preserves both you and bright sky), 3-second timer with burst.

Difficulty: Intermediate · The classic, done right
A mirror self-portrait is one of the few selfie variations that has survived because it solves the working-distance problem. The camera is pointed at your reflection, not at your face. Look for hotel mirrors, retail store mirrors, gym mirrors, glass storefronts at night. Frame yourself in the reflection with intentional negative space; if the room itself is interesting, include it. The phone should be held with both hands at chest or waist height (never above the head, since that looks unmistakably like a phone selfie).
Pro move: Set the phone on the Pocket Tripod a few feet from the mirror and use the 3-second timer. You're not in the shot holding a phone. You're in the shot, looking like you live there.

Difficulty: Intermediate · The shot people stop scrolling for
After it rains, the world is full of mirrors most people walk past. A puddle, a calm lake edge, a wet section of pavement. Any reflective surface low to the ground doubles the composition. Set the phone right at the surface (the closer to the water, the more dramatic the reflection). Frame so you appear in both the real world and the mirrored one. The trick is symmetry: get the camera as low as you possibly can and let the reflection fill the bottom half of the image.
Settings: Standard photo, grid on, exposure -0.3 EV (deepens reflection color), HDR off.

08
The Frame-Within-a-Frame
Difficulty: Intermediate · Lets architecture do the work
Use a doorway, an arch, a window, a tree's branches, or any other natural shape to frame your figure inside the larger photo. The composition draws the eye directly to you while letting the structure tell the location's story. This works especially well in old cities and on architecturally interesting trips, where every doorway is a potential composition. Position yourself fully inside the frame element; your phone goes far enough back to capture both the frame and you with comfortable space around you.
Settings: Portrait mode, grid on for alignment, 10-second timer + burst. Walk into the frame element, find your spot, and let the burst catch a natural pose.

09
The Long-Exposure Ghost
Difficulty: Advanced · The shot people ask you how you did
In a busy place (a train station, a market, a crowded square), set the phone on a stable surface and engage Night Mode at maximum duration (or use a slow-shutter app for 5–15 seconds). Stand perfectly still in the middle of the action. The crowd around you blurs into ribbons of color and motion; you stay sharp. The contrast between your stillness and the chaos around you creates an extraordinary photo that feels almost dreamlike. The technique requires absolute stability. The smallest tripod movement during exposure ruins everything.
Settings: Night Mode max duration, ISO low, focus locked on you, tripod absolutely still. Stand for the full duration without shifting weight or breathing heavily.
"The difference between a selfie and a self-portrait isn't the photographer. It's the working distance, the composition, and the willingness to set the phone down."
Why You've Never Tried Most of These
Read those nine techniques again and notice what every single one shares: the phone has to be set down somewhere, somehow, at the right angle. Not held. Not propped against a coffee cup. Not balanced on a wobbly rock. Stable, framed, and pointed exactly where you want it.
This is the gear problem solo photographers have always faced. Conventional tripods are too big to carry every day. Phone clamps are bulky. Selfie sticks limit you to arm's length and can't do any of the techniques above. So the techniques exist in tutorials and Pinterest boards, but most people never actually try them, because the gear required to execute them is sitting in a drawer at home.
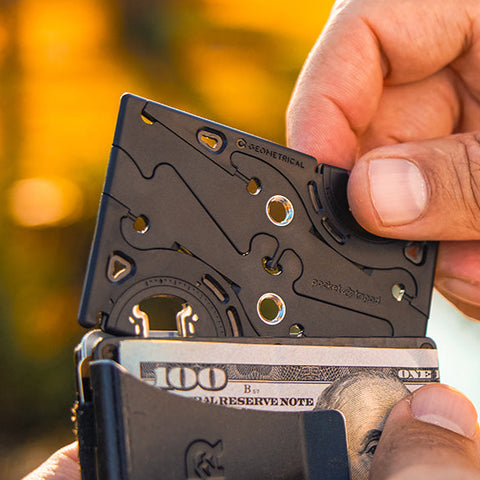
The Pocket Tripod was built specifically to remove this barrier. It's the size of a credit card, lives in your wallet, weighs 11 grams, and adjusts to any angle on any surface: flat ground, a stair, a bench, a bathroom counter, a hotel railing. Set it down, set the timer, walk into the shot. The reason the techniques in this article work isn't just composition theory. It's that you finally have the tool that makes them possible to actually execute.
The Tool That Makes These Possible
Stop Settling for Selfies. Start Taking Self-Portraits.
The Pocket Tripod PRO v2 is credit-card thin, lives in your wallet, fits any phone, any case, any angle. The single piece of gear behind every technique above. Lifetime warranty. Rated 4.8 stars by 9,800+ Kickstarter backers.
Shop Pocket Tripod →
Use code PLAYBOOK15 for 15% off your first order
All 9 Techniques at a Glance
Save this for the next solo trip. Pick the technique that fits the scene.
| # |
Technique |
Best For |
Difficulty |
| 01 |
Golden Hour Side Profile |
Outdoor warm-light portraits |
Beginner |
| 02 |
Silhouette Against Sky |
Sunsets, beaches, ridges |
Beginner |
| 03 |
Window Light Indoor |
Hotels, cafes, rented apartments |
Beginner |
| 04 |
Walking-Into-Frame |
Streets, paths, scenic vistas |
Beginner |
| 05 |
Low-Angle Hero |
Hikes, rooftops, open sky |
Intermediate |
| 06 |
Mirror Reflection |
Hotels, glass storefronts |
Intermediate |
| 07 |
Water Reflection |
After rain, calm lakes, beaches |
Intermediate |
| 08 |
Frame-Within-a-Frame |
Old cities, architecture |
Intermediate |
| 09 |
Long-Exposure Ghost |
Train stations, markets, squares |
Advanced |
The Real Takeaway
There's no good reason to come home from a solo trip with no decent photos of yourself. The techniques have always existed. They're the same composition rules portrait photographers use on other people. What's changed is the gear: a wallet-sized tripod and a 10-second timer eliminate the only barrier that ever stopped you. Set the phone down. Walk into the frame. Use light deliberately. Let the place be in the photo with you.
You don't need all nine. Pick two or three that fit your travel style and shoot them every trip. By the third one you've moved past selfies for good.
More photography reading: Capture perfect photos with the whole group · Best camera settings for sunny outdoor photos · 10 hidden iPhone camera settings even pros forget.