

Phone Photography · Beginner's Guide
Time-Lapse Photography on Your Phone: The Complete Beginner's Guide
Everything you need to shoot beautiful time-lapses with the camera already in your pocket. The science behind why it works, the six shots beginners should start with, exact settings for each, and the one piece of gear that turns the whole exercise from frustrating to effortless.
A time-lapse is the closest thing to magic an ordinary phone can produce. It compresses an hour, a day, or a full night into 15 seconds of video that reveals movement otherwise invisible to the human eye. Clouds drifting across a skyline, shadows traveling across a wall, a flower opening, a coffee shop filling and emptying. The same scene that you'd find boring to watch in real time becomes mesmerizing at 30x speed. And every modern phone has the capability built in.
The problem most beginners run into isn't the camera. Every iPhone since the 6, every Pixel since the 3, and every flagship Samsung from the last six years has competent time-lapse mode. The problem is everything around the camera. The phone moves a millimeter during the recording and the entire video becomes shaky. The battery dies halfway through. A notification pings and the audio gets corrupted. The phone overheats in direct sun and shuts down. Beginners try one time-lapse, get a blurry mess, and decide it's not their thing.
This guide solves all of those problems before you press record. It explains the physics of why time-lapses look the way they do, covers the six time-lapse types that beginners should start with (ranked easiest to hardest), gives the exact settings for each, and walks through the small but real gear list that makes time-lapse photography enjoyable rather than infuriating. By the end, you'll know how to plan, shoot, and share your first watchable time-lapse, and probably your tenth.
What a Time-Lapse Actually Is
Three sentences of theory that make everything below easier to understand.
It's not slow video. It's stitched photos. A time-lapse takes a series of still photos at regular intervals (every 2 seconds, every 10 seconds, every minute) and plays them back at normal video speed (24 or 30 frames per second). One hour of capture at one frame every 4 seconds becomes a 30-second video. The phone handles all the math automatically. You just choose the interval and the duration.
The speed-up effect is the entire point. Things that move slowly in real time (clouds, sunsets, traffic, people in public spaces) gain visual energy when compressed. Things that move fast in real time become invisible blurs at high speed. The art of choosing a good time-lapse subject is picking something whose motion is too slow to enjoy at normal speed but becomes beautiful when accelerated.
Stability is the rule, not a suggestion. Because the phone is comparing every frame against every other frame, even tiny movements between frames create a jittery, unwatchable result. The single biggest difference between a good time-lapse and a bad one is whether the phone moved during recording. The fix is mechanical, not technical: put the phone on something that doesn't shake.
The Setup Every Time-Lapse Needs
Five things to do before you tap record. Skip any of them and the time-lapse fails before it begins.
01
Put the Phone on Something Stable

Non-negotiable. The phone needs to be physically still for the entire recording duration (sometimes minutes, sometimes hours). Handheld is impossible. Leaning against a wall is not enough. A small tripod, a railing with the phone wedged against a wall, a stack of books, a windowsill. Any of these will work, but it cannot move once you start recording. The Pocket Tripod (more on this below) is purpose-built for this scenario.
Quick test: gently push the surface the phone is on. If anything wobbles, find something else.
02
Plug in the Charger

Time-lapses are battery-intensive. The phone is keeping the camera sensor active for the entire duration. A one-hour shoot can consume 30 to 50 percent of a full battery. For anything longer than 15 minutes, plug into a wall outlet or a portable power bank. This single step saves more time-lapses than any other piece of advice on this page.
For outdoor shoots: a 10,000mAh power bank is enough for a full sunset-to-night shoot with margin to spare.
03
Turn On Airplane Mode

A notification mid-recording can either pause the time-lapse (older Androids) or cause a visible frame jitter when the screen flashes briefly. Airplane mode prevents all of that. It also conserves battery significantly, since the phone isn't constantly searching for signals while it sits there recording. Bonus: nobody can call you and ruin the shoot.
If you need to keep Wi-Fi for cloud backup, just disable cellular and Bluetooth instead.
04
Lock Focus and Exposure

If you let the phone re-focus during recording, every refocus creates a visible blur frame in the final video. Same with exposure. If the phone auto-adjusts brightness as the light changes (which it will, especially during sunsets), the result is a stuttering, uneven look. Tap and hold on your subject in the camera app until the yellow "AE/AF LOCK" box appears. On iPhone, this is automatic. On Android, tap and hold the subject area before pressing record.
The exception: very long sunset time-lapses where you want the exposure to adapt. Those need a specialized app like Moment, Lapse It, or the built-in Pro mode on Samsung devices.
05
Frame Loosely, Crop Later

Native phone time-lapses shoot at 4K resolution, which leaves significant room to crop in editing. Frame your composition with about 15% more space on every side than you ultimately want. This gives you the flexibility to crop into the most interesting part of the scene afterward. It also recovers a usable shot if the phone shifted slightly during the recording (a small crop can re-stabilize a borderline result).
The grid overlay (Settings → Camera → Grid) helps with framing every time. Always on.
How Long to Record (And at What Interval)
Every time-lapse subject has a different ideal recording duration and frame interval. Match the subject to the row below. The native phone time-lapse app auto-adjusts the interval. You only control the duration.
Six Time-Lapses Beginners Should Start With
Ranked easiest to hardest. Shoot the first one this week. By the third, you'll know whether time-lapse photography is something you want to keep doing, and you'll have three watchable videos either way.
01
Clouds Drifting Across a Sky
Difficulty: Easy · 10 to 20 minutes · The starter time-lapse
The easiest watchable time-lapse you can make. Find a window or balcony with a view of sky and some foreground reference (a roofline, a tree branch, a hill). Frame the shot so the sky takes the upper 60% of the frame. The foreground gives the eye something static to anchor on, which makes the cloud movement feel faster and more dramatic. Best shot on partly cloudy days. An empty blue sky makes a boring time-lapse, but a sky with 30 to 60 percent cloud cover produces a constantly evolving composition.
Settings: Native time-lapse mode, 4K, focus locked on foreground, recording duration 10 to 20 minutes.
02
A Sunset (or Sunrise) Over a Horizon
Difficulty: Easy · 45 to 90 minutes · The crowd-pleaser
The most universally beloved time-lapse subject. Find a west-facing view (for sunset) or east-facing view (for sunrise) with a clear horizon. Water, mountains, a city skyline all work well. Set up about 30 minutes before sunset so you capture the golden hour color shift, the actual sunset, and the deepening blue hour that follows. The combination of color transition, cloud movement, and changing sky tones produces something that genuinely looks like art. This is the time-lapse people will share.
Settings: Native time-lapse mode, 4K, focus and exposure locked on the horizon, recording 60 to 90 minutes for full golden-to-blue transition.
03
A Busy Coffee Shop or Cafe
Difficulty: Easy · 20 to 60 minutes · Best for crowds and energy
Indoor and weather-independent. Find a corner table where you can wedge your phone against a wall or a stable surface aimed at the counter or main flow area. People come and go in random patterns, baristas move with rhythm, and the whole thing reads as a study of social energy. The shorter recording duration (20 to 30 minutes) compresses to a satisfying 5 to 10 second clip. Buy something so the staff doesn't mind.
Settings: Native time-lapse mode, 4K, focus locked on the busiest movement zone, ambient room light is fine.
04
Light Moving Across a Wall or Room
Difficulty: Intermediate · 2 to 4 hours · The "I made art" shot
A meditative subject that looks impressive precisely because most people never notice it happening. As the sun moves through the sky, the patch of light cast through a window crawls across the floor, the wall, the table. Set up the phone aimed at a wall or surface where direct sunlight will land for several hours. The recording duration is longer (2 to 4 hours), which is why this becomes intermediate. Battery, stability, and patience all matter. The result is a slow, almost-living movement of light that feels strangely emotional.
Settings: Native time-lapse, 4K, focus locked on the wall surface, phone plugged in, Airplane Mode on, do not disturb the setup for 2 to 4 hours.
05
A City Day-to-Night Transition
Difficulty: Intermediate · 3 to 5 hours · The portfolio piece
The classic skyline time-lapse. From a hotel room window, a rooftop, a parking garage, or any elevated position with city views. Start recording 30 minutes before sunset and continue until the city has been fully lit by its own lights for at least 30 minutes (typically 1 to 2 hours after full dark). The transition from natural light to mixed light to full city illumination produces dramatically changing color and contrast that feels almost cinematic. The phone may struggle slightly with the exposure shift. A specialized app like Moment or Hyperlapse helps if the native version produces visible flicker.
Settings: Native time-lapse with focus locked. For advanced control, the Moment app exposes a "holy grail" mode that smooths the day-to-night exposure transition.
06
Stars Rotating Across the Night Sky
Difficulty: Advanced · 4 to 8 hours · The aspirational shot
The shot that separates dabblers from people who really do this. Requires a dark-sky location (no city lights, ideally rural or a designated dark-sky park), a phone with strong low-light capability (iPhone 14 Pro and later, Pixel 7 Pro and later), a tripod absolutely stable for the entire night, the phone plugged in, and a recording duration of 4 to 8 hours. The final result shows the stars rotating around the celestial pole (visible as a single bright point in the north) in a way no human can perceive in real time. Frame with foreground silhouettes (trees, mountains, rocks) for compositional anchor.
Settings: Specialized app required (NightCap on iOS, Camera FV-5 on Android), interval of 20 to 30 seconds per frame, exposure 15 or more seconds per frame, infinity focus, RAW capture if available.
"The first time-lapse that actually works will surprise you. The second one will be easy. By the fifth, you'll be looking at every static scene around you wondering what it would look like compressed."
Four Mistakes That Ruin Beginner Time-Lapses
Each of these is responsible for the majority of failed first attempts. Avoid all four and your hit rate goes from one in five to four in five.
Mistake 1: Trying to shoot handheld. Even a one-minute time-lapse handheld produces jittery, unwatchable output. Your hand cannot stay still enough. This is physics, not skill. If you don't have a tripod, set the phone on a stable surface. If you don't have a stable surface, you don't have a time-lapse.
Mistake 2: Picking a subject that doesn't change. A static landscape with nothing moving produces 15 seconds of nothing. The point of a time-lapse is movement compressed into visibility: clouds, traffic, people, light, water, growth. If you can't see what's going to change during the recording, find a different subject.
Mistake 3: Stopping too soon. A 5-minute recording produces a 1 to 2 second clip. That's not a time-lapse, that's a glance. Plan for at least 15 minutes of recording for any meaningful subject, more for sunsets and shadows. Patience is the actual skill being trained here.
Mistake 4: Forgetting to lock focus and exposure. Without this lock, the phone refocuses periodically during the recording, causing visible blurry frames. It also auto-adjusts exposure as the light changes (especially during sunsets), producing flicker. Tap and hold on your subject until the lock indicator appears. This single step accounts for almost all "why does my time-lapse look choppy" complaints.
A Two-Minute Edit Makes It Watchable
Even a perfect raw time-lapse needs a small amount of editing to feel finished. Use the iPhone Photos app, Google Photos, or any video editor with these four steps.
Trim the start and end. The first 1 to 2 seconds of every time-lapse contain the phone's auto-focus settling and your hand pulling away. The last second often catches you reaching for the phone. Trim both. The good content is in the middle.
Crop to 16:9 or 1:1. Native time-lapses shoot at 4:3 or 16:9 depending on phone settings. Crop to 16:9 for YouTube and standard video uses, or 1:1 for Instagram in-feed. Cropping also lets you tighten the composition.
Add a slow fade at the start and end. Half a second of fade-in at the beginning and fade-to-black at the end makes the clip feel intentional rather than abrupt. Every consumer video editor has this as a one-tap option.
Add ambient music. Royalty-free instrumental music transforms a silent time-lapse from "video clip" to "piece of work." Match the energy: gentle music for shadows and clouds, more rhythmic music for cities and crowds. YouTube Audio Library is a reliable free source.
The Gear That Makes This Easy
Re-read the setup section. The first item, "put the phone on something stable," is the constraint that kills most attempts. A windowsill works for clouds and sunsets only if your window faces the right direction. A stack of books works on a table at home but not in a coffee shop, a hotel room, or on a hike. A full-sized tripod is the right tool, but nobody carries one through a regular day.
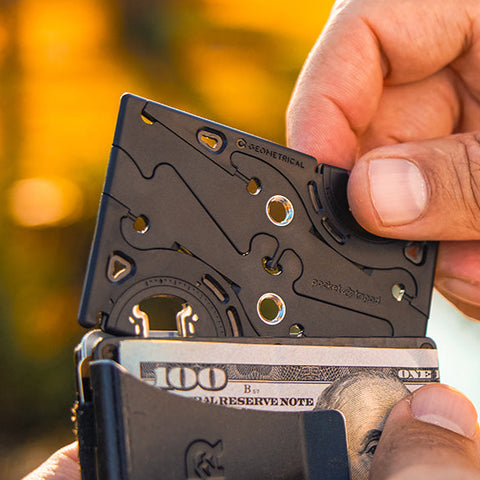
The Pocket Tripod solves the most boring problem in time-lapse photography: where to put the phone. It's credit-card thin (2.3mm), wallet-sized, 11 grams, and adjusts to any angle including the steep tilts that sunset and skyline time-lapses require. It works on a hotel desk, a hiking trail rock, the edge of a coffee shop table, the corner of a parking garage railing. It's the difference between "I should try a time-lapse" remaining a thought and becoming a video on your phone tomorrow.
Six of the six time-lapses above require a stable mount. The sixth (stars) requires absolute stability for 4 to 8 hours straight. The Pocket Tripod handles all of them.
The Tool Every Time-Lapse Needs
The Tripod That Lives in Your Wallet
The Pocket Tripod PRO v2 is the only fully adjustable phone tripod that fits in your wallet. 2.3mm thin. Works with any phone, any case. Every angle including steep tilts. Lifetime warranty. Rated 4.8 stars by 9,800+ Kickstarter backers.
Shop Pocket Tripod →Use code PLAYBOOK15 for 15% off your first order
All 6 Beginner Shots at a Glance
Pick your starter shot. Aim to try the first three within the next week.
The Real Takeaway
Time-lapse photography is one of the rare phone-photography topics where the technology has fully caught up with the imagination. The camera in your pocket can produce time-lapses that would have required a dedicated $2,000 camera and a laptop ten years ago. The only friction left is mechanical. Keeping the phone still, keeping it charged, locking the settings, picking a subject worth compressing.
Pick the cloud time-lapse this weekend. Set up by a window with a 30-minute view and a charger. Lock focus on the foreground, turn on Airplane Mode, tap record, walk away, come back in 20 minutes. You'll have a watchable time-lapse on your phone before dinner. That's the entire gateway, and once you're through it, the other five shots are just longer versions of the same skill.
More photography reading: The best mobile photography apps of 2026 · Golden hour photography on a phone · How to photograph fireworks with your phone.

