

Best Smartphone Camera Settings for Travel Photography in 2026
You've spent real money on a flagship phone with a remarkable camera system. You've researched the megapixels, the sensor size, the apertures. And then you pull it out on a sun-drenched hillside in Lisbon and shoot exactly the same way you'd photograph your lunch. You get fine photos. Not great ones. The gap between fine and great almost always comes down to settings — not hardware. Here's every setting worth knowing for travel photography in 2026, organized by situation so you can actually use them.
In This Guide
RAW vs HEIF Golden Hour Night Mode Pro / Manual Mode Action & Motion Video Stability
First Decision: RAW vs HEIF (And Why It Matters More Than Your Lens)
Before you take a single travel photo, decide whether you're shooting RAW or HEIF. This affects everything downstream — editing latitude, storage, speed — and most people never think about it consciously. They're just using whatever the phone shipped with.
HEIF (High Efficiency Image Format) is the default on iPhone and Samsung. It applies the phone's computational photography engine at the time of capture — HDR processing, noise reduction, sharpening — and produces a ready-to-share image. It's excellent for social media and anything you're not going to edit significantly. The downside is that you're baking in the phone's processing decisions, and if you want to recover a blown highlight or pull detail from deep shadows in post, you have limited headroom.
RAW (or Apple's ProRAW, or Samsung's Expert RAW) preserves the sensor's raw data before computational processing. You get a much larger file, but dramatically more editing latitude — especially for exposure recovery, color grading, and noise reduction using a proper tool like Lightroom Mobile. If you're someone who edits your travel photos at all, RAW is the setting to use for your intentional shots.
✎
Practical Tip
Use HEIF for quick street captures, food, and anything going straight to Instagram. Switch to RAW for landscapes, golden hour, and shots you plan to spend time with in post. Most phones let you set a default and override per shoot.
Golden Hour Settings: This Is When Your Phone Earns Its Price Tag
The 30 minutes after sunrise and before sunset are when travel photography separates itself from snapshots. The light is directional, warm, and low — and modern smartphone sensors handle it beautifully, but only if you help them along.
|
iPhone 17 Pro Recommended Settings
|
Galaxy S26 Plus Recommended Settings
|
Both Phones Universal Rules
|
One underused technique: expose for the sky, not the subject. Let your subject go slightly dark, then lift shadows in Lightroom. This preserves cloud detail and color gradients that blown-sky shots can never recover. Your RAW file has the data — use it.
"Expose for the sky, lift the shadows in post. The scene your eye sees and the scene your phone captures aren't the same — bridge the gap in Lightroom, not in-camera."
Night Mode: When to Use It, When to Override It
Both the iPhone 17 Pro and Galaxy S26 Plus have genuinely impressive night modes — the S26+ specifically improved Nightography video, and Apple's Night Mode on the main sensor produces cleaner low-light images than most dedicated cameras from five years ago. But auto Night Mode can work against you.
The phone determines Night Mode exposure duration based on how still it thinks you can hold the device. If you're handheld, it might cap at 1–3 seconds. On a stable surface, it'll go longer and gather far more light. The result difference is dramatic. A 1-second handheld Night Mode shot vs. a 5-second stabilized Night Mode shot aren't even comparable.
For night shots where you want to control the exposure yourself — long-exposure light trails on a busy street, star shots, architectural interiors — override auto Night Mode completely. On iPhone, shoot ProRAW with manual ISO and shutter speed in a third-party app like Halide. On Samsung, use Pro Mode directly in the native camera app and set ISO, shutter speed, and white balance manually.
Pro / Manual Mode: The Settings That Separate Intentional Shots from Lucky Ones
Most casual photographers never open Pro or Manual mode. That's a shame — the exposure triangle (ISO, shutter speed, aperture) is the difference between a shot of a waterfall and a photo of a waterfall. Smartphones don't have variable apertures (aside from a few exceptions), which means you're working with ISO and shutter speed. Here's how to think about them for travel:
ISO Guide
ISO 50–200
Bright daylight. Maximum detail, cleanest files. Use this whenever possible.
ISO 400–800
Overcast, shade, or indoors. Still clean on flagship phones. Generally safe territory.
ISO 1600–3200
Low light / night. Noticeable noise — stabilize and use the lowest ISO that gives you a sharp, properly-exposed shot.
ISO 6400+
Emergency territory. Prefer longer exposure on a stable surface over pushing ISO this high.
Shutter Speed Guide
1/2000 and faster
Freeze motion — birds in flight, waves crashing, street action. Bright conditions only.
1/250–1/500
Walking subjects, everyday street. The universal "safe" shutter range for travel.
1/60 or slower
Low-light stills. Camera shake becomes visible — stabilization is non-negotiable at these speeds.
1–30 seconds
Light trails, star trails, silky water. Only possible on a stable surface — worth carrying a small support for.
Video Settings for Travel: What to Change Before You Hit Record
Travel video has three enemies: shaky footage, washed-out color, and audio that sounds like it was recorded inside a vacuum cleaner. Here's how to address the first two in settings before you start filming.
The Setting Every Photographer Forgets: Stability
Dialing in your ISO, shutter speed, and RAW format is meaningless if the camera moves during the shot. This is the single most impactful thing you can do for your travel photography — not buy a new phone or master Lightroom — but give your phone a stable foundation.
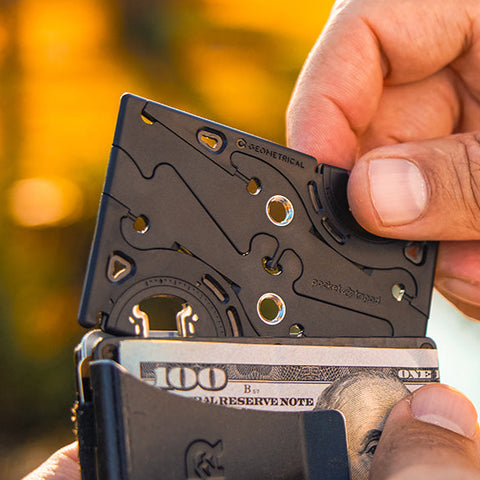
Traditional travel tripods are the obvious answer, but they're also 500 grams of weight and ten minutes of assembly. Most travel photographers end up leaving them in the hotel room. The alternative that actually gets used is something smaller: a wallet-sized support that you have on you constantly, that deploys in seconds, and that works with any phone and any case.
That's exactly what the Pocket Tripod PRO v2 is. It fits in your wallet, works at any angle from near-flat to near-vertical, and gives your iPhone 17 Pro or Galaxy S26 Plus the stable base that turns your carefully chosen settings into the image quality they were designed to produce. Every setting in this guide performs dramatically better when the camera isn't moving.
Quick Reference: Settings by Situation
Pocket Tripod PRO v2
Settings Are Only as Good as Your Stability
The world's only credit-card-sized adjustable phone stand. Fits in your wallet, deploys in seconds, works with any phone and any case. Unlock the full potential of every setting in this guide.
Shop the Pocket Tripod
